Steps to get Rfcat working on a eZ430-Chronos Dongle.
If you are interested on what Rfcat is watch this video https://youtu.be/ZWx8y5_J0Xo
Acquiring supplies
You will need 1 eZ430-Chronos kit (more specifically the PCB shown in the green box below)
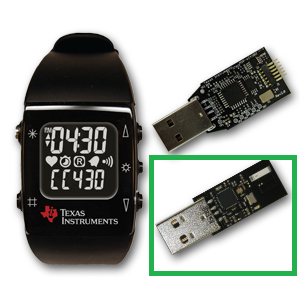
Note: this will only work on older eZ430-Chronos dongles with the black PCB. The newer kits have a white PCB that contains a CC1101. To the best of my knowledge the Rfcat project only runs on the CC1111. The eZ430-Chronos kit used was purchased from TI on 08/2011 during a sale for $24.50 USD.
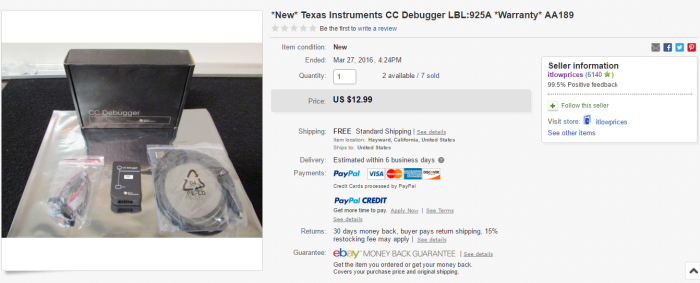
You will also need 1 CC-Debugger. They can be acquired from TI or in my case Ebay. Buying development tools from Ebay can be a gamble but the price was just too good for this CC-Debugger.
And here is the dongle and CC-Debugger:

Wiring:
Wiring the dongle is fairly straight forward. Since a bootloader will be installed it only really has to remain wired for a short period of time and does not need to be robust at all. Due to this some 30 awg solid core was used.

A diagram of how to wire the part can be found on page 47 of this pdf http://www.ti.com/lit/ug/slau292g/slau292g.pdf.
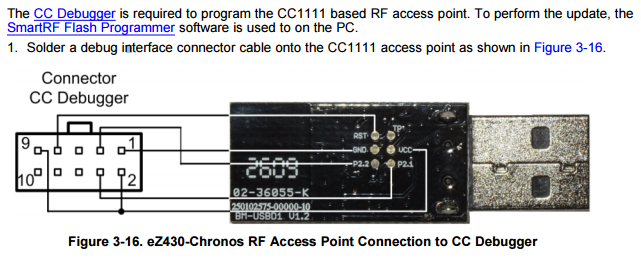
Note: the connector is wired as it would be looking into the CC-Debugger. If you are unsure of the connector orientation find a CC debugger pin-out and look at pins 1 and 9 (vcc and gnd) with a DMM.
Updating the CC Debugger
The easiest way to update the CC-Debugger to the latest firmware appears to be getting a copy of Smart RF Studio http://www.ti.com/tool/smartrftm-studio. Run the software with the CC-Debugger connected and you will be able to flash the CC-Debugger with the latest firmware.
Flashing the Chronos Dongle
Flashing the chronos dongle was done with SmartRF Flash Programmer (Version 1) http://www.ti.com/tool/flash-programmer. Version 2 was avoided since it did not have an apparent way to write protect the bootloader.
The hex files for Rfcat can be found here: https://bitbucket.org/atlas0fd00m/rfcat/downloads
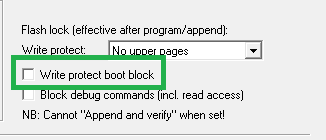
The bootloader (RfCatChronosCCBootloader-150225.hex) was written first:

Then the actual code was written (RfCatChronos-150225.hex) Make sure that the Write protect boot block check box is checked for this step.
If you have done everything correctly you now should have an Rfcat dongle.
Using the Rfcat dongle
An old netbook was used to test the dongle. It was re-formatted and 32 bit Ubuntu 14.04.4 LTS was loaded on to it http://releases.ubuntu.com/14.04/.
After setting up the OS python-usb and libusb were acquired.
After that the rfcat tarball was unziped and sudo python setup.py install was run to install rfcat.
A udev rule was added for the dongle but it ended up not working so it will not be documented. The tool can be run without the udev rule by issuing sudo rfcat -r

success!!
