Hydroponics Update Part 3

KIMG0610

To understand the context of this post you may want to read updates one and two.

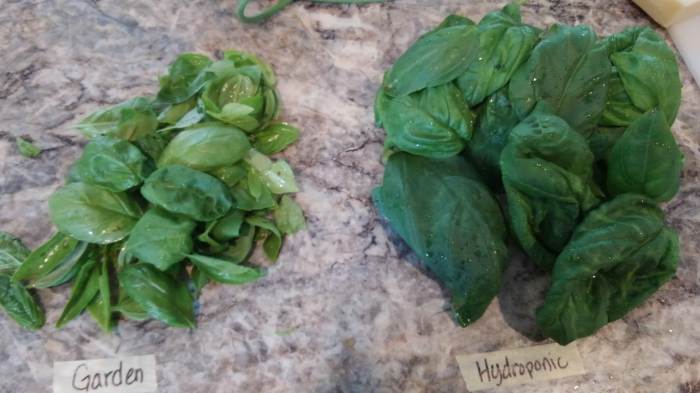
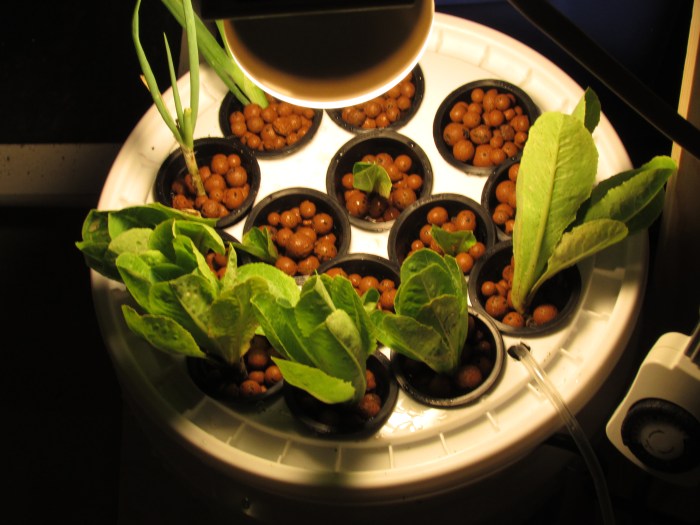
The half gallon mason jars worked well as shown with the romaine growing in the photo above. The jars started developing hairline cracks in the bottoms that started leaking.  This was more than likely due to routine handling during weekly water changes. This lead to attempting to find a plastic substitute for the mason jars.  The jars that were selected were a 96 ounce petg plastic container with a handle. These were prepared with a net cup similar to the process in post two. After a few months of growing an algae problem occurred in the jars. This is probably due to the high nutrient levels and bright lights the plants are grown under. A test is being conducted to see if painting the jars black will help combat this problem. Below is a photo of basil grown in the garden vs hydroponic basil grown in the new containers. The basil was started by cloning a basil plant purchased in the supermarket. The grow medium was rock wool.


KIMG1203

Mason Jar Hydroponics

The bucket system from a previous post was difficult to maintain. This was due to the fact that a 5 gallon bucket full of water weighs roughly forty pounds. Hauling that up my basement stairs to change out the water was not a fun task. This lead to trying to find a system that used smaller modular components to grow plants.

Parts Needed:

  • Wide mouth half gallon ball jars
  • Wide mouth plastic ball jar lids
  • 2″ net cups
  • 2″ hole saw
  • Tetra 77851 Whisper Air Pump, 10-Gallon
  • Tubing 1/4″ OD 3/16″ ID. This might be thicker than typical aquarium tubing.
  • Backflow valve
  • T valve
  • Small air stone
  • Rain Bird TS25/10PS Drip Irrigation 1/4″ Tubing Stake with Bug Cap Diffuser
  • rockwool cubes
  • fertilizer
  • 2″ hole saw
  • drill
  • drill bits

Assembly of the ball jar lids is pretty simple. Clamp the lid loosely in a vice and drill a 2″ hole with the hole saw for the net cup. Next drill a smaller hole so you are able to press fit the bug guard from the drip irrigation stakes. This part allows for the air tubing to be press fit into the jars for easy removal. After that plumb up the air pump add some water and the system is ready to grow plants.

Deep Water Culture Hydroponic System

This is a short write up of the deep water culture hydroponics system that was just constructed. The water is housed in a food safe bucket from the hardware store. Food safe was chosen due to the fact that chromium and other heavy metals can leach from non-food safe buckets.   The bucket contains a EcoPlus 396 gallon per hour pump without any nozzle. The bucket also contains a Tetra Whisper Air Pump connected to a large air stones  with tubing  and a back-flow valve  to prevent water from siphoning back into the pump if power is lost. The pump and fish tank air pump are used to oxygenate the water for the system and keep the water moving so that it will not get stagnant.

The top of the bucket was drilled out with a 2″ hole saw . The holes are filled with 2″ mesh net pots. These pots allow the plants roots to grow down into the constantly moving water. The pots are filled with clay pebble grow media. Before this media was used it was washed multiple times to remove any excess dirt from the media. Then it was placed in the bucket for a few days with the fish tank air pump to oxygenate the stones. This was a recommendation from multiple sources found online.

The light is just a standard led spotlight bulb wired to a light timer to give the plants a sense of day and night. The pump and air pump will be run continuously while the system is operational.

The final step was transplanting in some plants and fertilizing the plants. General Hydroponics MaxiGro fertilizer was chosen since it has a PH buffer in it . The PH buffer hopefully will prevent having to adjust the PH of the system over time.

Here are some photos of the system:

IMG_5415IMG_5418KIMG0110